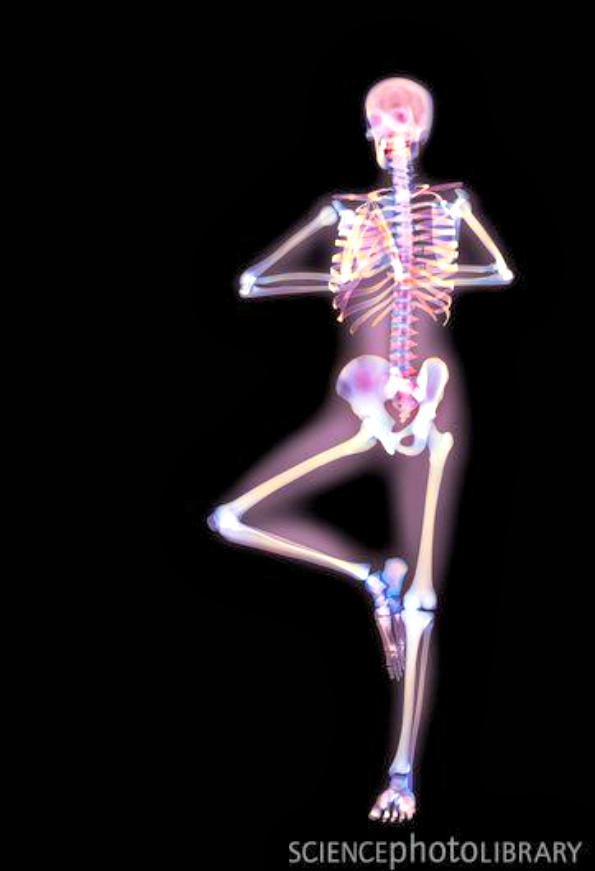
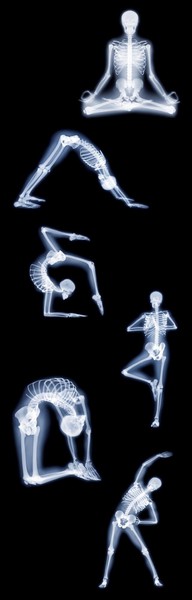
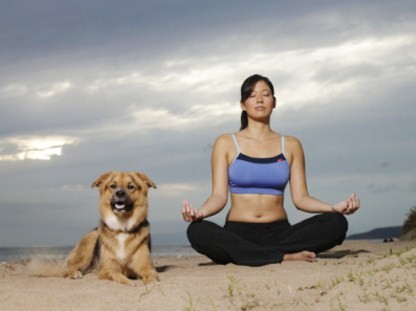
Yoga leads to increased flexibility and body awareness which is great for recovering from old injuries and preventing new ones. Yoga also relieves stress from your mind and body allowing for increased focus.
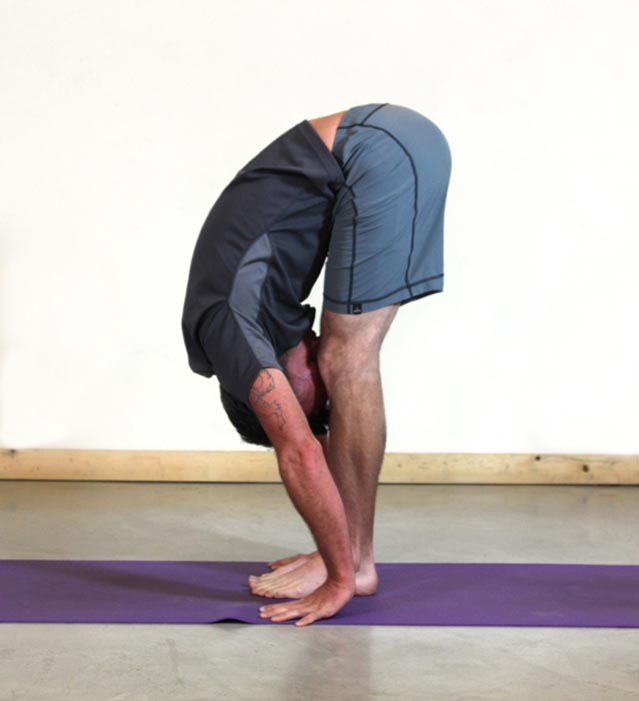
Uttanasana (Standing Forward Bend)
In Uttanasana, your head is below your heart. This allows the unusual occasion for blood to rush to your head (rather than your feet), giving your cells a rejuvenating boost of oxygen.
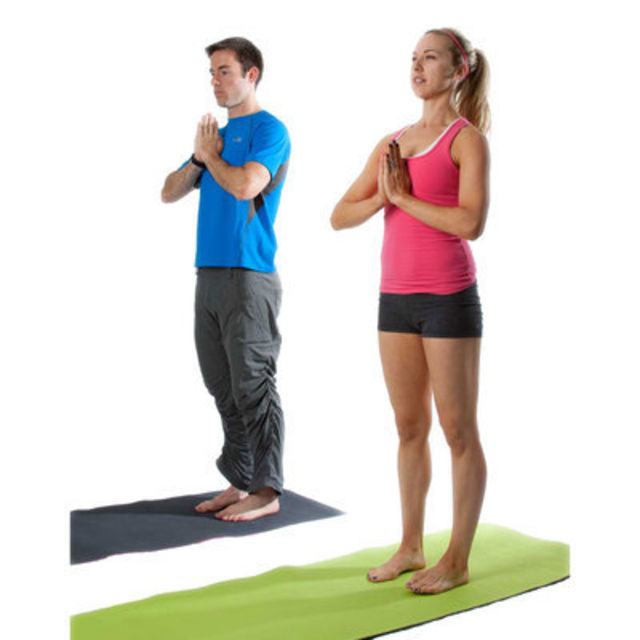
Begin in Tadasana (Mountain Pose):
Tadasana (Mountain Pose)
Rest your hands on your hips, exhale, and bend forward from the hip joints rather than the waist. Draw your belly slightly in and focus on lengthening your front torso as you go deeper in Uttanasana. Keeping your knees straight, place your fingertips or palms on the floor beside your feet, or touch the back of your ankles with your palms. To modify this movement, cross your forearms and hold your elbows. To help tone your thighs, press your heels into the floor, lift your sit bones toward the sky, and turn the tops of your thighs slightly inward. Let your head hang loose, releasing all tension in your back and shoulder blades. Lengthen the front torso a little bit more on each inhale. On each exhale, release fully into the bend. Stay in this posture for 30 seconds to 1 minute.
To come out of Uttanasana, bring your hands back to your hips and rotate at the hip joints until you stand strong and tall. Do not simply roll your spine up.
Benefits of Uttanasana
- Stretches the hips, hamstrings, and calves
- Strengthens the thighs and knees
- Keeps your spine strong and flexible
- Reduces stress, anxiety, depression, and fatigue
- Calms the mind and soothes the nerves
- Relieves tension in the spine, neck, and back
- Activates the abdominal muscles
- Eases symptoms of menopause, asthma, headaches, and insomnia
- Stimulates the kidneys, liver, spleen
- Improves digestion
- May lower high blood pressure
- Therapeutic for infertility, osteoporosis, and sinusitis
Adho Mukha Svanasana (Downward Facing Dog Pose)
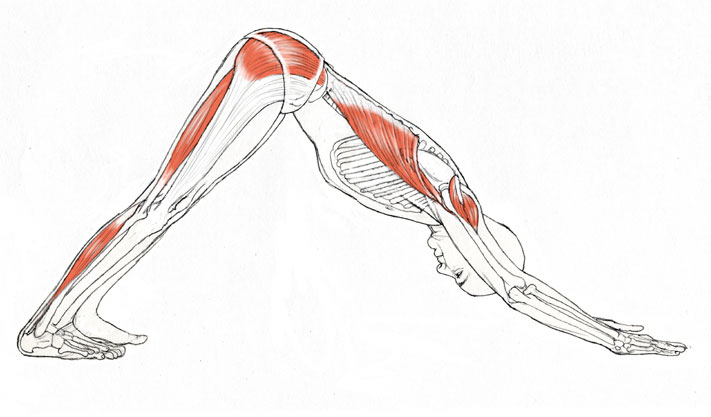
Start on all fours with your knees directly underneath your hip and your hands directly underneath your shoulders. The palms are firmly grounded onto the mat and your fingers are spread. Pull your stomach in and melt your chest towards the floor. Tuck your toes underneath you. Lift your knees away from the floor, lengthen your spine backwards and shoot your tailbone up towards the sky as you straighten out your legs. Push the top of your thighs back and stretch your heels towards the floor. Form the shoulder blades onto the back, release the neck and extend your heart towards your thighs. Hold the pose for three minutes, rest, and repeat one more time.
Benefits of Adho Mukha Svanasana
- Inverted poses are extremely important because they reverse the action of gravity on the body and get the blood and lymph flowing in opposite directions.
- On an emotional level downward facing dog helps turn everything on its head and helps us see things from a different angle.
- It helps boost self-confidence.
- Because of the increased blood flow to the top of the body, shoulder stand can help improve brain function and cognition and reduce anxiety and depression.
- Takes pressure off the heart, which has to work less to get blood flowing to the brain.
- Strengthens and tones the arms and legs
- Because of the weight bearing nature of the posture on the arms and legs it helps strengthen the bones and prevent osteoporosis.
- Lengthens and straightens the spine, helping to relieve pain in the upper, middle and lower back.
- The body gets a 360-degree stretch in just one pose.
Utkatasana (Chair Pose)

Begin in Tadasana (Mountain Pose). Stand with your big toes touching, heels slightly apart. Lift and spread your toes. Feel yourself rooted to the ground. Now, raise your arms above your head, perpendicular to the floor. Either keep your arms parallel, palms facing inward, or touch your palms together. Bend your knees and bring your thighs as parallel to the floor as possible. Your knees should come out over your feet and your torso should lean forward over the thighs, more or less forming a right angle with them. Keep your back long, with a slight curve in it, and keep the inner thighs parallel to each other. To intensify your thigh work-out, try squeezing a yoga block or holding a thick book between them. Let your shoulder blades relax down your back. Stay in this posture for 5 to 10 long, deep breaths.
To come out of Utkatasana inhale, straighten your knees, exhale and release your arms to your sides. You are now back in Tadasana.
Benefits of Utkatasana
- Tones the leg muscles excellently
- Strengthens hip flexors, ankles, calves, and back
- Stretches chest and shoulders
- Reduces symptoms of flat feet
- Stimulates the heart, diaphragm, and abdominal organs
Utthita Ashwa Sanchalanasana (High Lunge)
Start in Adho Mukha Svanasana (Downward-Facing Dog). Exhale and step your right foot forward between your hands, aligning your knee over the heel. Keep your left leg strong and firm. Inhale and raise your torso to upright. At the same time, sweep your arms wide to the sides and raise them overhead, palms facing. Do not over-arch the lower back. Lengthen your tailbone toward the floor and reach back through your left heel. This will bring the shoulder blades deeper into the back and help support your chest. Look up toward your thumbs. Be sure not to press the front ribs forward. Draw them down and into the torso. Lift the arms from the lower back ribs, reaching through your little fingers. Hold for 30 seconds to a minute. Then exhale, release the torso to the right thigh, sweep your hands back onto the floor, and, with another exhale, step your right foot back and return to Down Dog. Hold for a few breaths and repeat with the left foot forward for the same length of time.
Benefits of High Lunge
- Opens your groins and hips
- Stretches and tones your legs, especially thighs
- Strengthens your knees, ankles and waist
- Stimulates abdominals’ organs
- Increases stamina and lung capacity
- Lengthens the spine, thereby stretching the chest
- Therapeutic for indigestion, constipation, sciatica
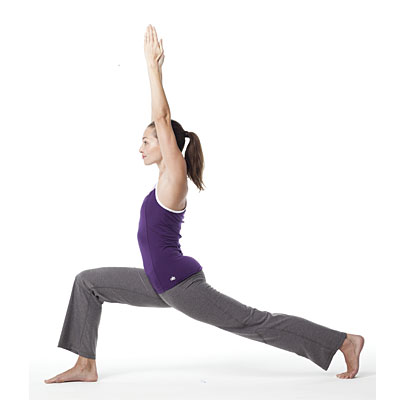
Virabhadrasana I (Warrior I Pose)

Begin in Utthita Ashwa Sanchalanasana (High Lunge) with your right leg forward. If you are in correct stance, your right knee should be directly over your right ankle. Your right toes should point straight ahead and your left toes should be pointed 45-60 degrees away from your body. Make sure your right heel is in line with your left heel, then engage your legs by pressing through your feet. Bring your hands to your hips, squaring your hips and shoulders straight ahead. Then, relax your shoulders down your back and gently draw them together. Inhale and lift your arms straight up over your head, palms facing each other. If possible, bring your palms together. Now, reach up strongly through your arms. Avoid puffing out your sides; rather lift through your sternum so you can feel a nice stretch in your entire torso and spine. Keep your shoulders relaxed and chest lifted. To deepen the stretch, keep your palms together and gently arch your back, gazing up towards the ceiling. Feel strength and stability in your stance. Breathe deep and steady while you hold the pose for one minute.
To release, come back into high lunge, straighten the right leg, pivot your body 90 degress to the left, and point your toes in the same direction. Extend your arms out to your sides and you will be in Utthita Hasta Padasana (Extended Hands and Feet Pose). Take a few breaths of relaxation and repeat the exercise with your left foot forward.
Benefits of Virabhadrasana I
- Strengthens your shoulders, arms, legs, ankles and back
- Opens yours hips, chest and lungs
- Improves focus, balance and stability
- Encourages good circulation and respiration
- Stretches your arms, legs, shoulders, neck, belly, groins and ankles
- Energizes the entire body
Setu Bandhasana (Bridge Pose)
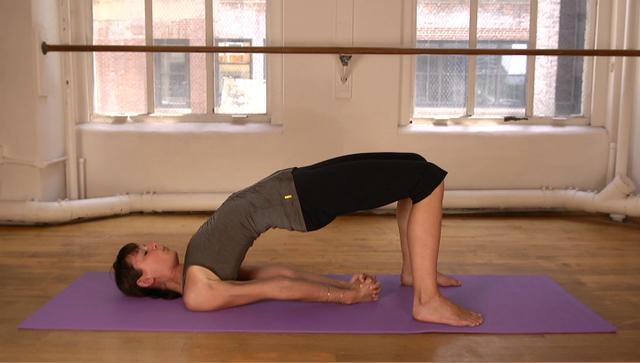
Lie flat on your back with arms at your sides, palms down. Bend your knees and place your feet flat on the floor. Keep your feet hip width apart, parallel to each other, and as close to the buttocks as possible. Simultaneously, press your upper arms and feet into the floor and begin lifting your hips towards the ceiling. Distribute your weight equally on the inside and outside of your feet. Now, move your breastbone towards your chin, keeping your chin lifted only slightly as not to flatten the back of the neck. Firm your tailbone in towards the pubis and move your pubis slightly towards the belly. In order to keep the lower back extended, keep the knees over the ankles, perpendicular to the floor. Your buttocks should be firm, but not clasped. Lift your hips as high as you are able without breaking position. If you are having trouble holding posture, you can clasp your hands behind your back and firm you arms into the floor, shoulder blades shifted down along the spine. Hold this pose for 5 to 15 breaths.
To come out of Bridge Pose, release on an exhalation, rolling your spine slowly down onto the floor.
Benefits of Setu Bandhasana
- Stretches the chest, neck, spine, and hips
- Strengthens the back, buttocks, and hamstrings
- Improves circulation of blood
- Helps alleviate stress and mild depression
- Calms the brain and central nervous system
- Stimulates the lungs, thyroid glands, and abdominal organs
- Improves digestion
- Helps relieve symptoms of menopause
- Reduces backache and headache
- Reduces fatigue, anxiety, and insomnia
- Rejuvenates tired legs
- Relieves symptoms of asthma and high blood pressure
- Therapeutic for hypertension, osteoporosis, and sinusitis
Ardha Dhanurasana
Lie on your belly, with the legs together or a few inches apart. Bring the chin to the floor. Bend the left knee and reach the left hand back to hold onto the left heel or ankle. Inhale and kick the left foot into the arm to lift the left leg, head and chest off of the floor. Keep the neck in line with the spine, looking down at the floor. Lift the right arm off of the floor, keeping it parallel to the floor. Breathe and hold for 2-6 breaths.
To release slowly exhale and lower the leg, arm, head and chest down to the floor. Repeat on the other side.
Benefits of Ardha Dhanurasana
- Energizes and strengthens the entire body
- Builds core body strength.
- Stimulates the kidneys, adrenals and reproductive system.
Paripurna Navasana (Full Boat Pose)
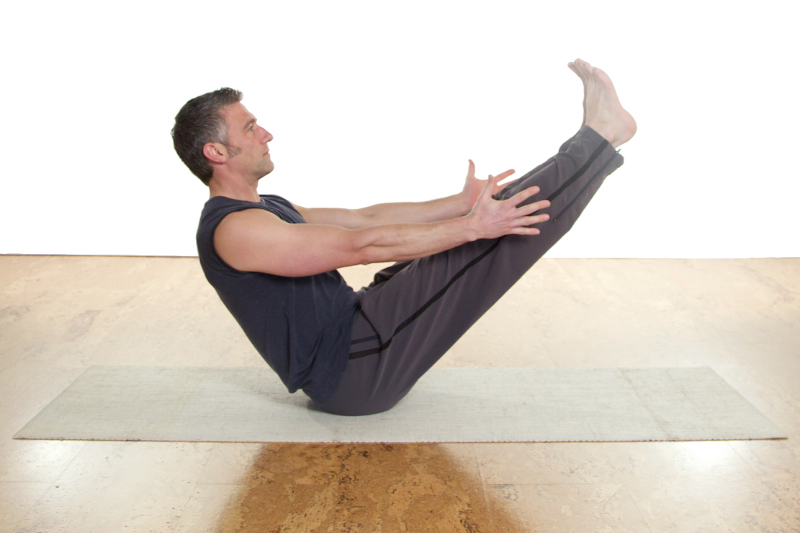
Sit on the floor with knees bent, feet flat, and legs together. Slide your hands a little behind your hips, fingers pointing toward your feet and elbows bent away from you. Lean back slightly and lift your heels an inch or two off the floor. Make sure your back does not round, keep your back straight throughout this pose. Draw your shoulder blades together momentarily to lift and open your chest. Slowly begin to straighten your legs through the heels. When your legs are fully straightened, your thighs should be angled about 45 degrees to the floor and the tips of your toes should be slightly above the level of your eyes. If you are unable to straighten your legs while raising them, keep your knees bent (shins parallel to the floor). Now, stretch your arms forward alongside your legs, palms facing down. Spread your shoulder blades across your back and reach strongly out through your fingers (while maintaining a straight back and long torso). Your arms should be parallel to each other as well as to the floor. If you are unable to raise your arms while in Paripurna Navasana, either grip the back of your thighs or keep your hands behind your hips where they were. Open your chest and relax your shoulders down your back. Put as much effort into lifting your chest as you are in lifting your legs. Breathe steadily and hold for 2-6 breaths. Gradually increase your endurance until you can hold the posture for a full minute.
To release bring the legs in as you exhale and sit upright as you inhale.
Benefits of Paripurna Navasana
- Tones and strengthens your abdominal muscles
- Improves balance and digestion
- Stretches your hamstrings
- Strengthens your spine and hip flexors
- Stimulates the kidneys, thyroid and prostate glands, and intestines
- Aids in stress relief
- Improves confidence
Virasana (Hero Pose)
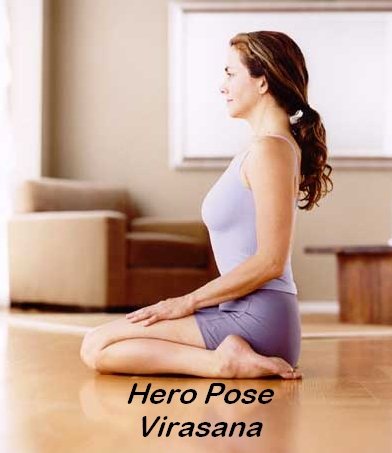
Start by kneeling on your yoga mat or the floor with your thighs perpendicular to the floor. Pad your knees, shins, and/or feet with a folded blanket or towel if necessary. If you experience any strain in your knees at any time while in Virasana, come out and prop yourself up further before attempting it again. Make sure the tops of your feet stay flat and even on the floor. Bring your inner knees together, then slide your feet apart (a little wider than your hips). Point the feet in line with the shins. Gently pull back the flesh of your calf muscles, exhale, and sit down between your feet. Evenly support your sitting bones by adjustment, allowing a thumb’s width space between your heels and hips. If your buttocks don’t rest comfortably on the floor, raise them by placing a yoga block or thick book between your feet before you sit down. Counteract the tendency to slump by adjusting the muscles of your buttocks sideways and back with your hands. Your pelvis should be at a ninety-degree angle with your thighs. Rest your hands in your lap, on your thighs, or on your ankles. Firm your shoulder blades against the back ribs and lift the top of your sternum. Widen the collarbones and release your shoulder blades away from your ears. Lengthen the tailbone toward the floor. Sit in silence for at least 1 minute.
Benefits of Virasana
- Stretches the hips, thighs, knees, ankles and feet
- Improves circulation and relieves tired legs
- Strengthens foot arches, relieving flat feet
- Improves digestion and relieves gas
- Helps relieve the symptoms of menopause
- Improves posture
- Reduces swelling of the legs during pregnancy (through second trimester)
- Therapeutic for asthma and high blood pressure
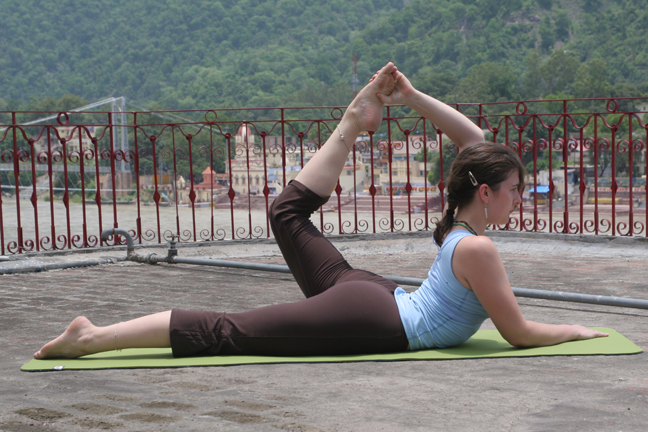
Supta Padangusthasana
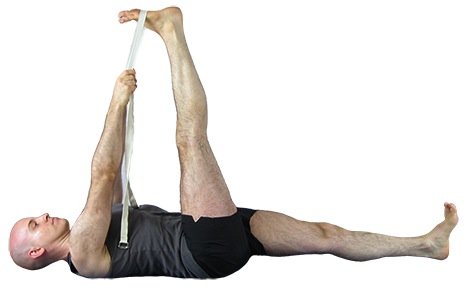
Lie supine on the floor, legs strongly extended. If your head doesn’t rest comfortably on the floor, support it on a folded blanket. Exhale, bend the left knee, and draw the thigh into your torso. Hug the thigh to your belly. Press the front of the right thigh heavily to the floor, and push actively through the right heel. Loop a strap around the arch of the left foot and hold the strap in both hands. Inhale and straighten the knee, pressing the left heel up toward the ceiling. Walk your hands up the strap until the elbows are fully extended. Broaden the shoulder blades across your back. Keeping the hands as high on the strap as possible, press the shoulder blades lightly into the floor. Widen the collarbones away from the sternum. Extend up first through the back of the left heel, and once the back of the leg between the heel and sitting bone is fully lengthened, lift through the ball of the big toe. Begin with the raised leg perpendicular to the floor. Release the head of the thigh bone more deeply into the pelvis and, as you do, draw the foot a little closer to your head, increasing the stretch on the back of the leg. You can stay here in this stretch, or turn the leg outward from the hip joint, so the knee and toes look to the left. Pinning the top of the right thigh to the floor, exhale and swing the left leg out to the left and hold it a few inches off the floor. Continue rotating the leg. As you feel the outer thigh move away from the left side of the torso, try to bring the left foot in line with the left shoulder joint. Inhale to bring the leg back to vertical. Lighten your grip on the strap as you do, so that you challenge the muscles of the inner thigh and hip to do the work. Hold the vertical position of the leg anywhere from 1 to 3 minutes, and the side position for an equal length of time.
Once you have returned to vertical release the strap, hold the leg in place for 30 seconds or so, then slowly release as you exhale. Repeat on the right for the same length of time.
Benefits of Supta Padangusthasana
- Stretches hips, thighs, hamstrings, groins, and calves
- Strengthens the knees
- Stimulates the prostate gland
- Improves digestion
- Relieves backache, sciatica, and menstrual discomfort
- Therapeutic for high blood pressure, flat feet, and infertility
These useful yoga poses can be done in a circuit as their own workout or as a precursor to another athletic activity of your choosing.
Were these yoga poses helpful? What are some of your favorite poses?

 Helps build strength, flexibility, and mental focus through a sequence of movements. Vinyasa is a flowing style of yoga which links the movements or asanas with breath work. Ashtanga yoga is a series of poses done in a quick-paced Vinyasa flow.


